HOW IT WORKS
What installing Core0 actually looks like
Core0 runs on machines you own. There is no account to create, no endpoint to call home to, and no stage where your data passes through us. This page walks through an install as the person doing it sees it, using screenshots from a real deployment rather than diagrams of an idealised one. Tap or click any screenshot to open it full size.
What to have ready
One person can run the whole thing, in an afternoon. It is not a project that needs a team of engineers or a quarter of planning. What it does need is a short list of things prepared beforehand, because the wizard asks for them and will not proceed without them.
- A Linux machine to run the installer from, with a desktop and a browser. This one is not temporary: it joins the WireGuard mesh during the install and stays part of it. The admin panel is reachable from inside that network and nowhere else, so this is the machine you will administer Core0 from afterwards. Treat it accordingly — it is not a laptop you hand back at the end of a contract.
- Machines for your nodes — three, six or ten depending on the tier, running Ubuntu 24.04 or 22.04, on static addresses. A fresh install is easiest; anything already running Docker or nginx will get in the way.
- The root password for each node. The installer connects over SSH and uses the credentials once, to bootstrap.
- Internet access on the nodes during installation, for package downloads. Once the mesh is up the nodes only need to reach each other and your mail server, so with an internal relay the cluster can come off the internet entirely.
- Two USB drives or dedicated disks for the key shares, so you leave the ceremony with more than one copy, kept apart.
- SMTP details for an address Core0 can send from — your own internal relay, or an external provider if you would rather. It is how the system tells you about expiry and security events, and it is the only thing the cluster reaches out to once it is running.
- Disk space for what you intend to store. Eighty gigabytes per node covers the system comfortably; if you are running ObsydiaFiles, the PII data nodes need room for the documents on top of that.
That is the whole list. A more detailed checklist, with port numbers and a node inventory to fill in, comes with the licence.
You supply the machines
You give the installer an address and a login for each node. The tier decides how many: three for Starter, six for Pro, ten for Enterprise. Roles are assigned for you — key nodes, PII nodes, logic, bridge, witness — because getting that split wrong is what makes a vault a single point of failure.
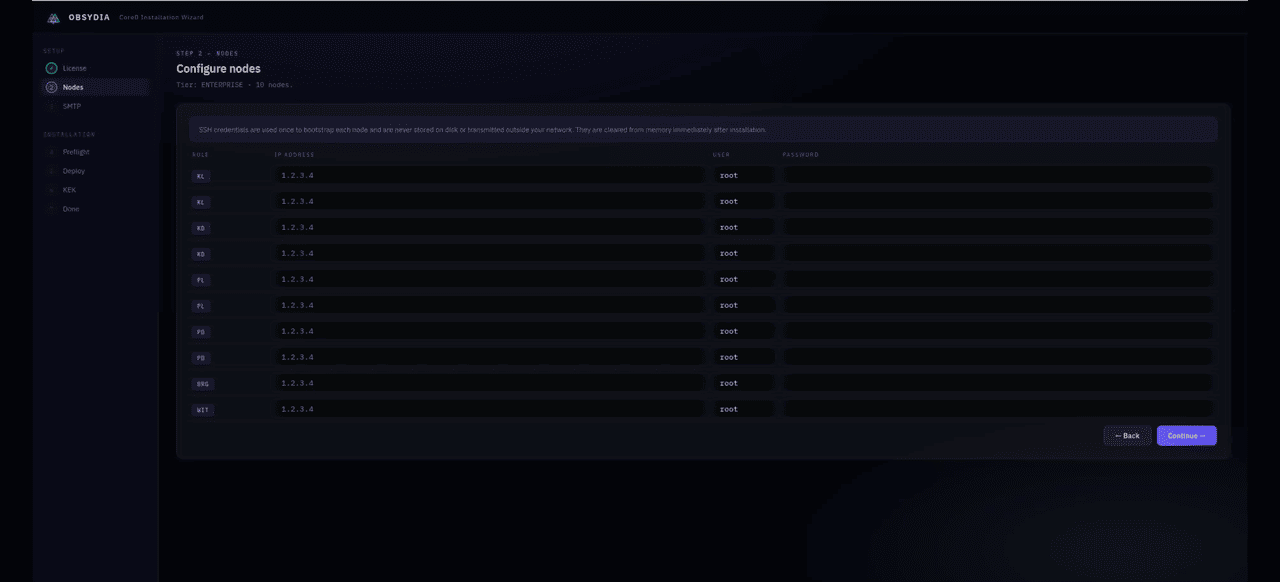
SSH credentials are used once to bootstrap each node. They are not written to disk and not sent anywhere outside your network.
The installer builds the network before it builds the vault
Before any Core0 service starts, the installer establishes a WireGuard mesh between every node, applies nftables rules, and brings up a Consul quorum. Only then do the services deploy. You watch it happen line by line — the log is the interface, not a progress bar with a spinner over it.
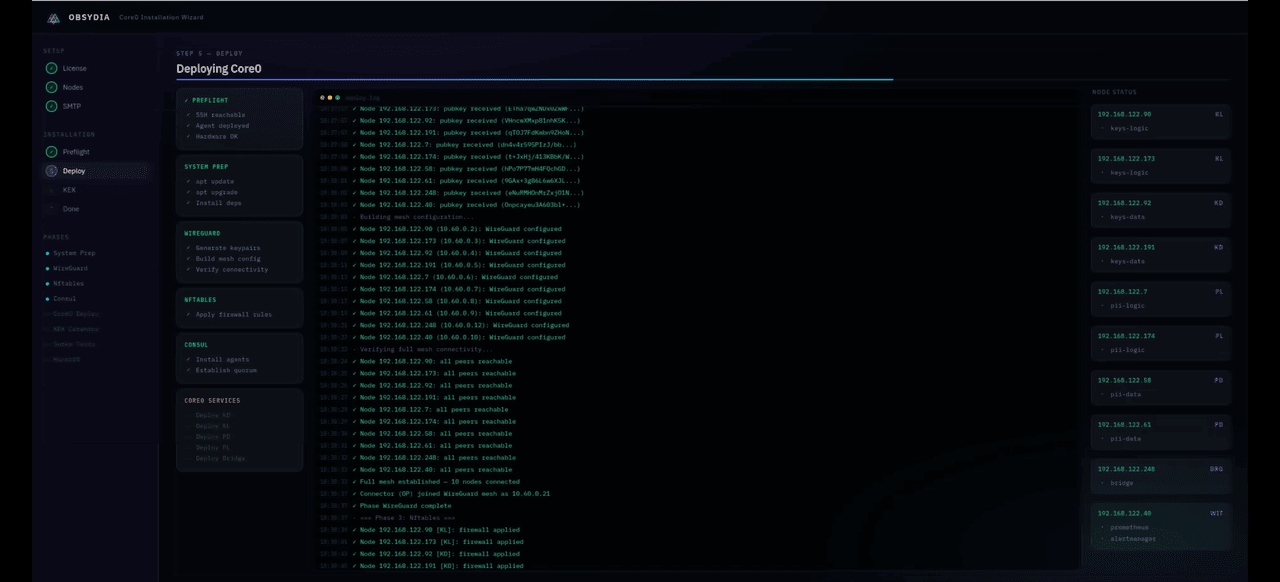
Ten nodes joining a mesh, each verified reachable from every other, before a single record exists.
The keys are yours, in the strictest sense
At the end of the install, the master encryption key is split into three shares using Shamir Secret Sharing. Two of the three reconstruct it. The wizard assigns each share a destination — paper in one location, a password manager, paper in another — so the shares are separated by default instead of ending up in one drawer.
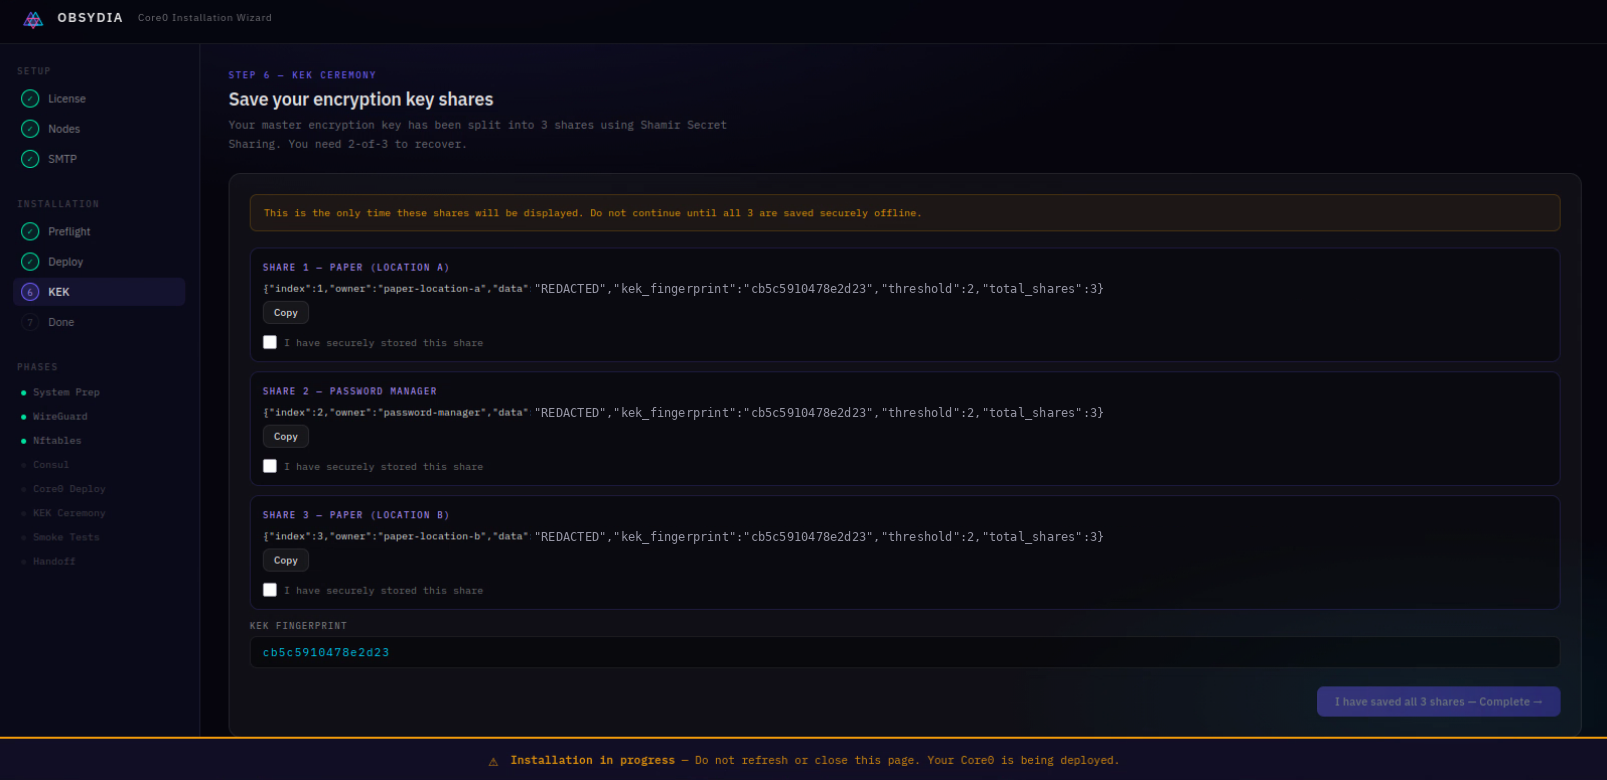
Share values are redacted here. In a real install they appear once, on your screen, and are seen by nobody but the person sitting in front of it.
Two consequences follow, and both are worth stating plainly. Nobody at Obsydia ever sees a share, so we cannot read your data and cannot be compelled to hand over a key we do not have. And if you lose two of the three shares, the data is gone — for you and for us. There is no vendor override, because a vendor override is exactly the thing this design exists to remove. If you need a copy that survives the loss of the vault, Core0 exports your data under a separate export key.
Then it hands over and gets out of the way
Smoke tests run, the installer confirms the instance is live, and that is the last time it is involved. There is no ongoing connection back to us, and no licence check that phones home.
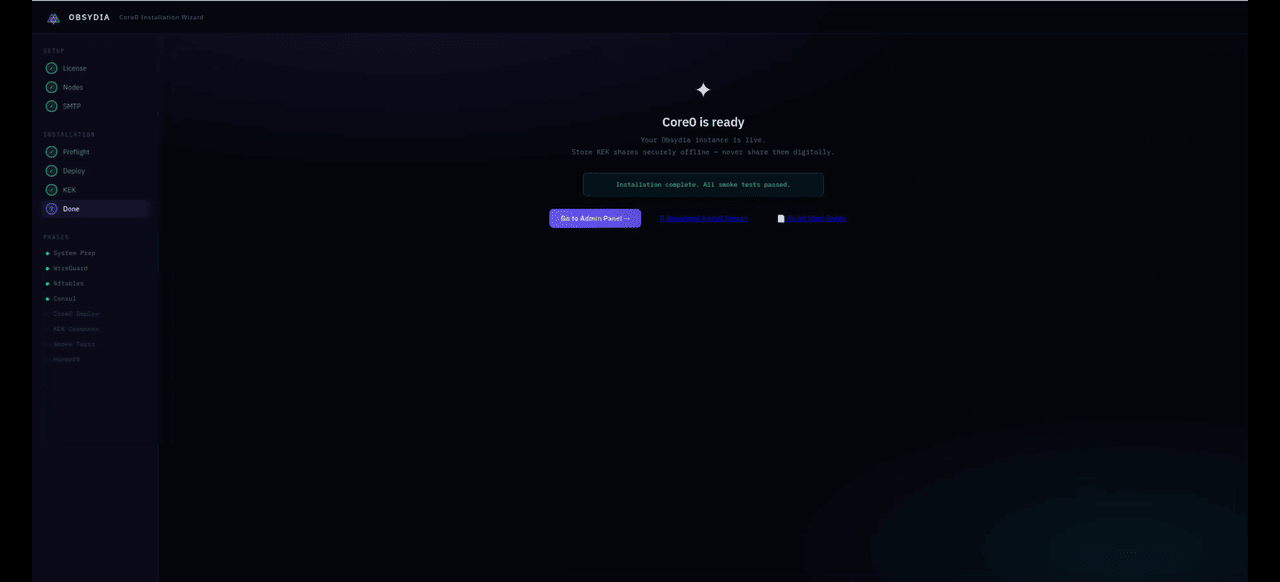
The instance is yours from this point. Updates are something you pull when you choose to.
What you can see afterwards
The client panel shows the state of the system without exposing what is in it: record counts, service health, replication lag per node, certificate expiry, licence term remaining. Enough to operate the vault, not enough to read it.
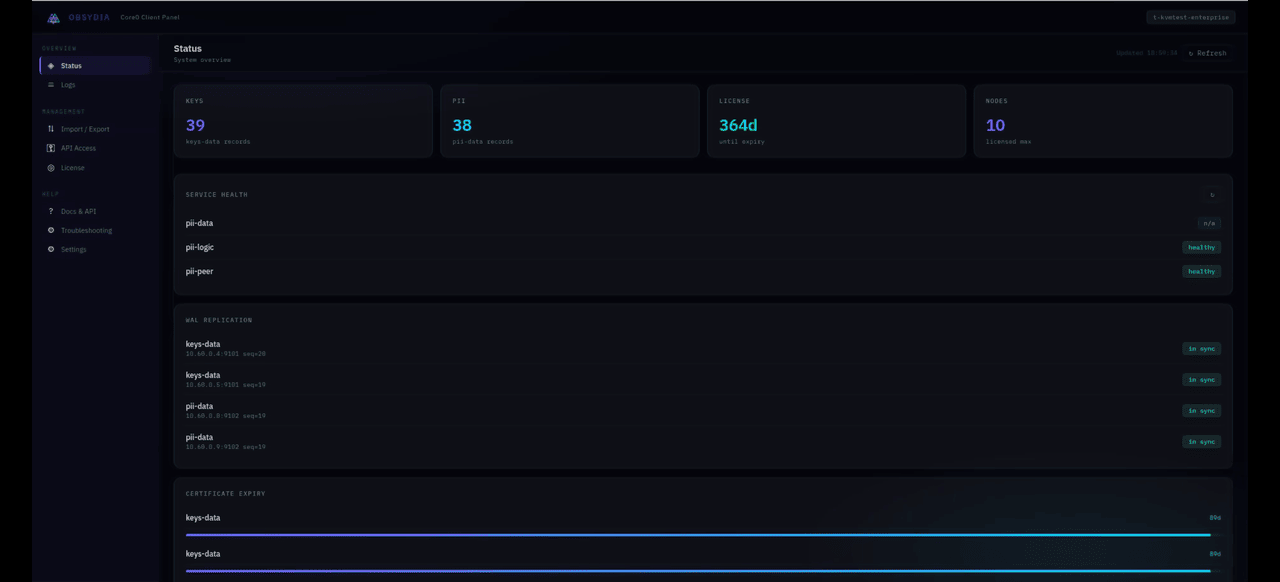
Replication state is per node and per stream, so a replica falling behind is visible before it matters.
Every access is recorded, and the record resists tampering
Each audit entry carries a sequence number and the hash of the entry before it. Change or remove one entry and the chain no longer verifies. The chain survives service restarts, which is the part that is easy to claim and easy to get wrong.
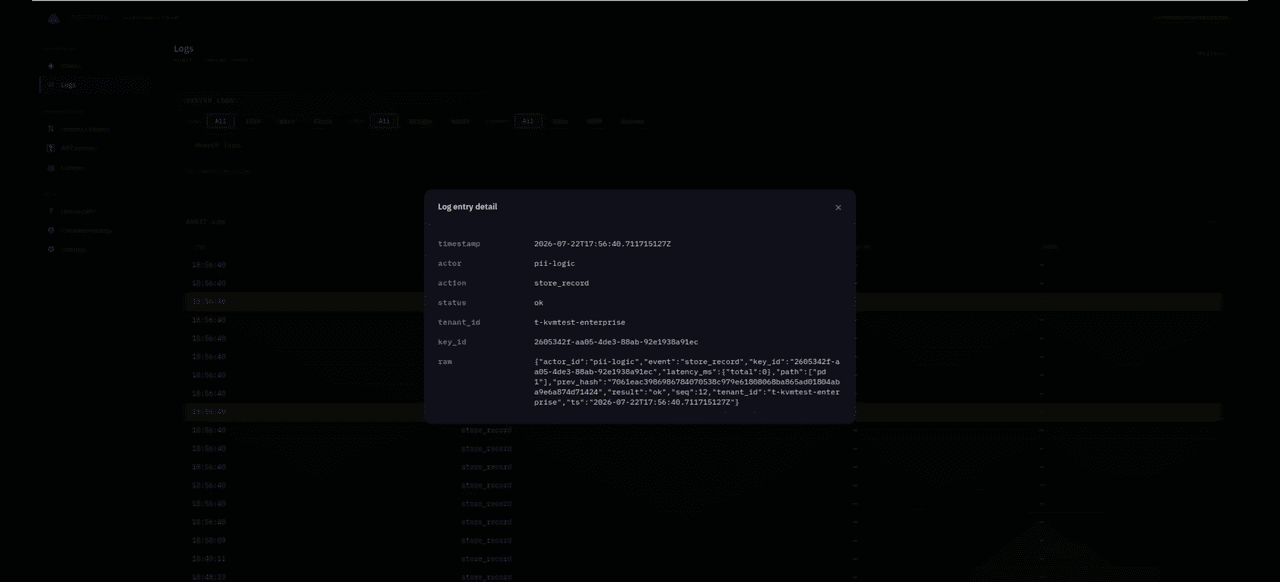
Actor, action, key used, sequence, and the previous hash — enough to reconstruct who touched what, without the entry containing any personal data itself.
What this page does not cover
This is the happy path. The trust model — what each zone can see, what an attacker holds after compromising one, and which failures the design does not defend against — is written up separately, in more detail and with less optimism.
Read the architecture and trust model